The following is a transcript of the talk on Using WordPress as a Headless CMS, that developer Benjamin Read gave at WordCamp London 2018. The talk covered:
1. What is a headless (or decoupled) CMS
2. Why use WordPress as a headless CMS
3. Tools and process for building a headless site
4. A basic example and some gotchas we found
5. The Future is (probably) headless
Hello everybody, Nice to be here with you at WordCamp London.
I work for Indigo Tree, based in Hertfordshire, and we have been building websites with WordPress as a headless CMS. I am going to talk today about what that is and why we should consider working with it.
We are going to show you some of the tools that we’ve found amazing, as well as a couple of examples of things we have already built. Hopefully, you’ll be inspired by what we have done so you can experiment with this way of working too.
First of all, what is headless and why use it?
1. What is a headless (or decoupled) CMS
Like you, we consider ourselves professional developers and genuinely care about our clients and their users. We noticed a disparity between what website users want and what we could deliver. They want near-instantaneous access to the content that our clients provide. This near-instantaneous access doesn’t reveal anything about the kind of device they are using, where they are in the world, the network they’re on, or the browser they are using.
We wanted to determine how we could best meet the needs of users in these situations.
There are a couple of things that happen between when someone requests a website, and some of these things are totally beyond our control. However, there are a few things we can alter to improve the response time.
We examined the application’s run time closely. In any application, the biggest bottleneck is with database queries and API keys. This happens when a user requests the site. WordPress builds that site, pulling all the data from the database and the APIs, and sends it to the users. That’s the most significant bottleneck we could control, and one that affects our users the least.
It is vitally essential for our users to get the website they want in the shortest time possible. After about 3 seconds, there is a significant drop-off where users will often give up waiting. That’s an important metric for our clients as well, not just for direct conversion opportunities, but also because Google uses page speed as a ranking factor to order its search results. Slower sites will likely be ranked lower in comparison to faster sites because they’re deemed to be less relevant to users.
After considering possible solutions, we decided to go with the solution of using WordPress as a headless CMS.
2. Why use WordPress as a headless CMS
We are accustomed to this setup with WordPress, where content authors add their pages, blog posts, media, videos, and products to WordPress, and we create a theme to display this content on the front end.
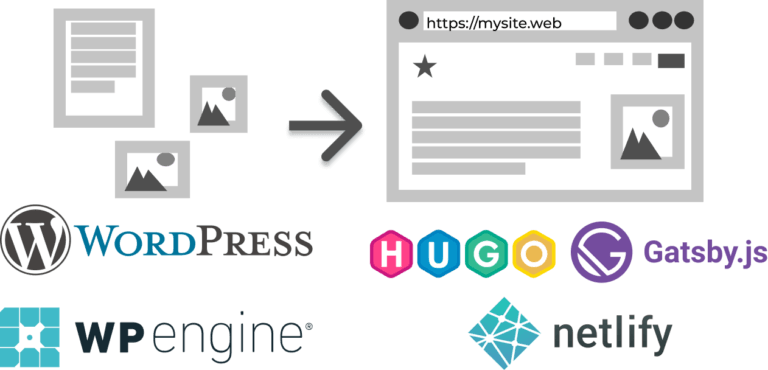
However with Headless, we still have our WP site. It’s still hosted somewhere. We generally use WPEngine, they’ve consistently provided a great service, and their support team is very helpful. Recently, we were able to get SSH access into our servers, which saves us even more time. So now you have a separate website that is now a static site/html that is served elsewhere.
There are a couple of benefits to this:
- Our content authors can just worry about their content
- As developers it helps us worry about the data and the experience our users are having
As an added bonus there’s some really cool tools and APIs that we can work with.
3. Tools and process for building a headless site
WordPress comes with the REST API out of the box which is a great starting point, you don’t have to do anything to turn it on, its already there for you.
At Indigo Tree, we have expanded on this with a couple of additional features. Like you, we are probably using Advanced Custom Fields to add extra meta boxes and data to our posts. We use the plugin ACF to Rest API, which adds the Advanced Custom Fields data to be queried in your Rest API.
We’ve been using Gravity Forms on our static site, so we can utilise the Gravity Forms API to display the forms in the back end.
We also wrote a couple of plugins that I will get into a bit later, but they really helped make our sites functional and dynamic, even though it’s a static site.
We are still working on a solution that we like for our menus – we haven’t yet found a solution we’re happy with, so we’re hard-coding them into our static sites. If anyone has any ideas, please let us know.
That’s all we need for WordPress; here are a few of the tools we’ve been using with our static sites.
Static Site Generators
Have you ever searched on Google for static site generators? There are hundreds for every language and framework you can imagine. There’s even one for VueJS that has just been released.
When we examined our clients and use cases, we asked the question, “Which static site generator suits our needs best?” And we settled not just on one but chose two that meet our different use cases when working with WordPress as a headless CMS.
Hugo

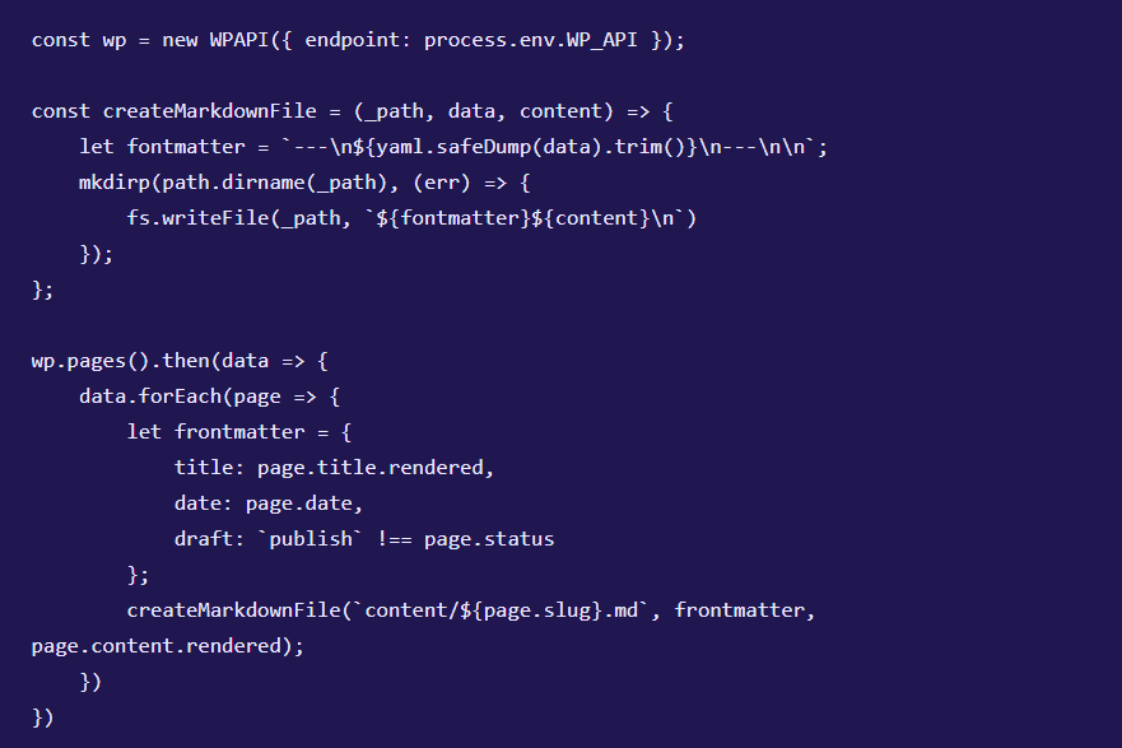
Hugo is built on the GO programming language – it’s fast. It can compile thousands of pages of content in fractions of a second. It also has similar paradigms to WordPress. As a WordPress developer, transitioning to Hugo helped a bit, particularly with post types and shortcodes. Hugo works well at what it does, but Go is a static binary that accepts Markdown files as its content, which is a minor issue: WordPress posts are stored as HTML entities.
const wp = new WPAPI({ endpoint: process.env.WP_API });

const createMarkdownFile = (_path, data, content) => {
    let fontmatter = `---\n${yaml.safeDump(data).trim()}\n---\n\n`;
    mkdirp(path.dirname(_path), (err) => {
        fs.writeFile(_path, `${fontmatter}${content}\n`)
    });
};

wp.pages().then(data => {
    data.forEach(page => {
        let frontmatter = {
            title: page.title.rendered,
            date: page.date,
            draft: `publish` !== page.status
        };
        createMarkdownFile(`content/${page.slug}.md`, frontmatter, page.content.rendered);
    })
})
To resolve this, my colleague Chris has written a Node.js script that serves as a function. This utilises a few libraries and retrieves WordPress data from a specified endpoint, creates Markdown files for each page, adds YAML front matter so Hugo knows how to process it, and inserts the content as rendered HTML, allowing us to import WordPress pages into Hugo.
The other thing about Hugo is it’s a great system and we love it, but it’s not built to be extendable. If you had another use case that you wanted to write a plugin for, it’s not built for that. So we looked at another static site generator to allow us to extend what we are doing and adapt to our clients’ needs.
For this, we turned to Gatsby, using WordPress as our headless CMS.
Gatsby

I have to admit, I love this tool.
Gatsby is the new kid on the block; it’s been around less than 2 years and is currently approaching version 2. There’s a lot of cool stuff planned for version 2 that I’m looking forward to.
Gatsby is terrific to use because it’s JavaScript, so it’s highly customisable. It already has a robust plugin ecosystem, is open-source, and has attracted numerous contributors. Additionally, it’s built on React. This means we can pull things in from the whole React ecosystem as well as the Gatsby ecosystem — and because it’s JavaScript, anything from Node Package Manager can potentially be used in your Gatsby project as well. And it uses GraphQL to query your data.
I’m going to show you a bit more about that before I explain what GraphQL is.
Setting Up a Headless Project
Assuming I already have a WordPress site and am about to configure a Gatsby project. The first step is to open our gatsby-config.js file. I am just setting some metadata here for display purposes. You can see that I already have the plugin, gatsby-source-wordpress, which I can point at the URL. It knows the REST API endpoint. I can choose specific parameters, such as whether I’m using HTTPS, whether I am on WordPress.com, and whether I’m using Advanced Custom Fields.
module.exports = {
  siteMetadata: {
    name: `Benjamin Read`,
    title: `How We're Using WordPress as a Headless CMS`,
    date: `April 14, 2018`
  },
  plugins: [
    {
      resolve: "gatsby-source-wordpress",
      options: {
        baseUrl: "wcldn2018talk.wpengine.com/",
        protocol: "https",
        hostingWPCOM: false,
        useACF: true,
        searchAndReplaceContentUrls: {
          sourceUrl: "https://wcldn2018talk.wpengine.com",
          replacementUrl: "https://wpheadless.indigotree.co.uk",
        },
      },
    },
  ]
};
This was built by my colleague David Hewitt. This is one of the benefits of open source — we have been able to contribute to this project and get involved as a team to help both ourselves and the community.
Now we need to instruct Gatsby on what to do with the data when it arrives. For that, we need to open the gatsby-node.js file and add this code:
const path = require('path');

// Implement the Gatsby API “onCreatePage”. This is
// called after every page is created.
exports.onCreatePage = ({ page, boundActionCreators }) => {
  const { createPage, deletePage } = boundActionCreators;

  return new Promise((resolve, reject) => {
    // Remove trailing slash
    const newPage = Object.assign({}, page, {
      path: page.path === `/` ? page.path : page.path.replace(/\/$/, ``)
    });

    if (newPage.path !== page.path) {
      // Remove the old page
      deletePage(page);
      // Add the new page
      createPage(newPage);
    }

    resolve();
  });
};

// Create slides from WordPress.
exports.createPages = ({ boundActionCreators, graphql }) => {

  const { createPage } = boundActionCreators;
  const blogPostTemplate = path.resolve(`src/templates/slide.js`);

  return graphql(`
  {
    allWordpressPost(
      sort:{
        fields:date
        order:ASC
      }
    ) {
      edges {
        node {
          id
          title
          content
          date
          slug
        }
      }
    }
  }
  `).then(result => {
    if (result.errors) {
      return Promise.reject(result.errors);
    }
    let i = 1;
    result.data.allWordpressPost.edges.forEach(edge => {
      const absolutePath = `${edge.node.slug}`;
      const fileName = path.basename(absolutePath, path.extname(absolutePath));

      createPage({
        path: i,
        component: blogPostTemplate,
        context: {
          absolutePath,
          id: `${edge.node.id}`
        }
      });
      i++;
    });
  });
};
We are creating each page and path, and then it uses GraphQL to query the data from the Rest API.
GraphQL
GraphQL is a new Query language, and we believe it will ultimately replace the REST API in many cases. The reason is that you can do a lot more with GraphQL.
When you hit the Rest API with WordPress, you get a lot of data. With GraphQL, you can filter the data before you pull it in. In the example, I only want to get the ID, title, content, date and slug. And I’m sorting by Content/Date and Slug.
I can do all this before I pull in all the data, which is much more efficient.
With each result, I create a page with my component and insert it into a template that I’ve previously defined.
import React from 'react';

export default () => (
<div>
<h1></h1>
<div></div>
</div>

);
The template is a React component that uses JSX and is empty, allowing you to compare it with what we do next.
export const pageQuery = graphql`
  query SlideByPath($id: String!) {
    wordpressPost(id: { eq: $id }) {
      id
      title
      slug
      content
      date
    }
  }
`
Here I’m adding my data to it – another GraphQL query this time for this individual post.
export default ({ data, pathContext, transition }) => (
  <div>
    <h1 dangerouslySetInnerHTML={{ __html: data.wordpressPost.title }} />
    <div dangerouslySetInnerHTML={{ __html: data.wordpressPost.content }} />
  </div>
);
Here I’m setting the content of the <div> and <h1> from the query. You’ll notice I’m using this function “dangerouslySetInnerHTML” — why is it called that? Remember, we are working with HTML here. There may be potential risks associated with this. However, in this context, it’s perfectly fine to use it; at least it gives you some warning, so you’re aware of the potential risks it involves.
import React from 'react';
import Styled from 'styled-components';

const Slide = styled.article`
  width: 100%;
  height: 100%;

  > h1 {
    font-size: 1.4rem;
  }
  &:before {
    content: '';
    position: absolute;
    top: 0;
  }
  @media (min-width: 768px) {
    color: indigo;
  }
`;

export default ({ data, pathContext, transition }) => (
  <Slide>
    <h1 dangerouslySetInnerHTML={{ __html: data.wordpressPost.title }} />
    <div dangerouslySetInnerHTML={{ __html: data.wordpressPost.content }} />
  </Slide>
);
I am adding styles here using the styles components. This might be a bit weird to look at, but once you start working with this structure, it starts to make a lot of sense.
The reason is that if I no longer want to use slides and instead prefer pages, for example, I can simply stop using this component; all the associated styles are included with it, and I no longer have the CSS cluttering my project, which is a performance benefit.
As a developer, when I’m coming into this project after a break, I can more easily see what I’m doing: there’s my HTML, there’s my DB query, and there’s my style. I don’t have to worry about all the rest of the project I can think about this component only. This has helped me to speed up my workflow.
So that’s GatsbyJS!
Now, let’s see how we submit comments to WordPress from a static site.
Submitting a Comment with Lambda Functions
On our static site, we have a form which submits to a URL where we have a lambda function ready to receive the data:
const request = require('request');

exports.handler = (event, context, callback) => {

    let apiPath = process.env.WP_API;

    // get the data from event.body
    let data = event.body;

    // check if it's base64 encoded. if it is, convert it to json.
    if (event.isBase64Encoded) {
        data = Buffer.from(data, 'base64');
    }

    data = JSON.parse(data);

    // validate that required fields have been set and are not empty strings
    if (data.name != '' && data.content != '' && data.post != '') {

        // if ok, then pass request onto wpapi
        request({
            method: 'POST',
            uri: `${apiPath}/wp/v2/comments`,
            body: {
                author_name: data.name,
                content: data.content,
                post: data.post
            },
            json: true
        },
        (error, response, body) => {
            if (error) {

                console.log(error);

                callback(null, {
                    statusCode: 500,
                    headers: {
                        'Content-Type': 'application/json'
                    },
                    body: JSON.stringify({
                        "message": "There was a problem posting your comment. Please try again later.",
                        "status": "error"
                    })
                });

            } else {

                // get the response back from the api, and then send back some data
                callback(null, {
                    statusCode: response.statusCode,
                    headers: {
                        'Content-Type': 'application/json'
                    },
                    body: JSON.stringify(body)
                });

            }
        })

    } else {

        // If data was missing, then return back a validaton error
        callback(null, {
            statusCode: 400,
            headers: {
                'Content-Type': 'application/json'
            },
            body: JSON.stringify({
                "message": "Some fields were missing from the request.",
                "status": "error"
            })
        });

    }

}
This function runs on the server, not the client. What is “lambda”? It’s functions-as-a-service. Several major providers now offer them, including Amazon, Google, and Microsoft.
You can post up this code and not worry about any of the server architecture; you don’t have to maintain it or anything. It simply runs this code inside a container when you hit this endpoint, and if there’s a lot of traffic, it’ll spin up a series of containers that will all run the same code to meet the demand.
This retrieves the data from the specified endpoint, parses it as JSON, and then hits our API path. As a result, the next time someone logs into WordPress, they can view the comment, approve it, and the next time the site is built, it’ll be displayed on our static site.
So you see, “static” sites, they’re not relatively so static now, are they?! There’s a lot we can do, all without a server, but still using WordPress as a headless CMS.
The reason we’ve been able to do that, or at least make it a lot easier for us, is because of Netlify.
Netlify Hosting
Netlify is an excellent service for managed hosting of static sites.
We love it. Not only does it come with lambda functions, but it also supports continuous deployment. This means that you commit your code to your GIT repository, and it builds the site for you.
Then, if there’s an error of some kind, it won’t go live, so if you’ve introduced some dodgy code it won’t break your site. Look at the error logs, fix the problem, and then deploy the updated code.
This is a very robust way of producing sites; we love it.
There are several notable enhancements that Netlify has introduced recently, making it an even more appealing service to use.
There are a few other tools in our toolchain because, of course, we’re not using WordPress any more—we’re just getting the content from WordPress. So there are a few things we need to consider.
Algolia Search
For example, we can’t use WordPress’ built-in search function, so we’ve used a service called Algolia. It already has a WordPress plugin, so it’ll push your content up to its servers, then from your static site you can query that, change the URLs and have a search function on your site.
Algolia is a lot better than WordPress’ native search. It supports fuzzy matching for spelling mistakes and weighting, so you can make one section of content more critical in search results than another section.
Cloudinary Image Hosting
We’ve also used Cloudinary for serving our images. We didn’t want to go back to WordPress every time we had an image to display. Chris Geary wrote a plugin for WordPress that uploads the folder to Cloudinary, which is then propagated globally via CDN. It’s swift. This service alone has been instrumental in making our static sites as fast as they are.
You can upload files, it’ll serve the lowest file size to your browser, whether that’s PNG, JPEG, WebP or anything else, and you can specify an array of different image sizes, and it will crop your images to these dimensions.
That’s our toolchain, a few of the services that have enabled us to use WordPress as a headless CMS.
Now I’m going to show you a couple of examples.
4. Some Examples
Pharmasure
When I first built this site, it was using markdown files for the backend. Then, later, I switched to using WordPress. Honestly, when I switched from one site to the other, I didn’t even notice. I had to do a double-take, because nothing had changed! For all intents & purposes, this was the same site, just getting the connect from somewhere else.
This shows the power of working with WordPress as a headless CMS. You can switch your entire back end out; it’ll take less than a day, and nothing will change for your clients and the website users.
So, if your clients come to you and want to rebrand, you can simply build another static site elsewhere. Then, switch the domain and still use the same content store without any issues, and without downtime.
I was amazed when that happened.
Live site: https://www.pharmasure.co.uk/
We’re also building another site, which is going to replace our current agency site eventually:
next.indigotree.co.uk
https://next.indigotree.co.uk
Chris has been working hard on this. He’s a total performance junkie, I’m sure he won’t mind me saying that. We’ve been tracking the changes in performance between using WordPress and static results, and the difference is quite dramatic.
This shows you some of the real-world performance benefits of using WordPress as a headless CMS.
This Talk!
The third example is the slides from my talk! It’s using Gatsby with a WordPress backend and uses a pre-written starter called “gatsby-starter-deck” to display that content as a presentation.
Here is the site: https://wpheadless.indigotree.co.uk/
4. Gotchas and Limitations
Has it all been plain sailing? No, we have encountered some issues along the way that have caused us to think and rethink what we’re doing.
First of all, this isn’t WordPress any more, and it would be difficult to even compare the two. A lot of the things we might be used to using aren’t going to work for us, or they’re going to be different.
Plugins
A lot of the plugins we’re used to using just won’t work when using WordPress as a headless CMS. We have had some experience with the following:
- Advanced Custom Fields
- WooCommerce (should be OK, has API)
- Gravity Forms (needs Lambda because private keys)
- YoastSEO – needs some customisation to be queried on REST API
- Shortcodes – extra markup OK, anything else, exercise caution
Other plugins may not function at all or yield unpredictable results.
Deployment
Another thing to watch out for is that deployment takes time. When a content author writes a post, they can’t expect to hit the “publish” button and for that to show up on the site straight away. Our solution was to write a plugin that displays a button in the WP Admin Bar so users can trigger a deploy after they’ve finished editing their content.
But this still takes a minute or two to build the site. Content authors are going to have to get used to this delay when using WordPress as a headless CMS.
Encoded HTML
One specific issue that I encountered was when I was working with encoded HTML.
import React from 'react';
import Helmet from 'react-helmet';

export default class pageTemplate extends React.Component {
  render() {
    const post = this.props.data.wordpressPage;

    return (
      <div>
        <Helmet title={`${post.title}`}/>
        <h1 dangerouslySetInnerHTML={{__html: post.title }} />
        <div dangerouslySetInnerHTML={{__html: post.content }} />
      </div>
    )
  }
}
You can see I’m using post.title in the `<h1>` and in Helmet. Helmet is a tool that allows you to set metadata outside of your React component, for example, the meta description or, in this case, the meta title. This worked fine until someone added a dash to the title in WordPress.
After that, I had something like “my 𔌚 post title”. So my colleague David Hewitt and I worked on this solution.
import React from 'react';
import Helmet from 'react-helmet';
import { DOMParser } from 'xmldom'

export default class pageTemplate extends React.Component {
  render() {
    const post = this.props.data.wordpressPage;

    const dom = new DOMParser().parseFromString(`<div>${this.props.data.wordpressPage.title}</div>`);
    const titleString = dom.childNodes[0].textContent;

    return (
      <div>
        <Helmet title={`${titleString}`} />
        <h1 dangerouslySetInnerHTML={{__html: post.title }} />
        <div dangerouslySetInnerHTML={{__html: post.content }} />
      </div>
    )
  }
}
Here we’re pulling in this tool “xmldom” from NPM, parsing the title as a string, and then getting the text content from the node. This means we can now set the title as HTML.
So the outcome of our issue was successful; we just had to think around the problem. And although yes, this was an issue, it also shows the power of Gatsby. This isn’t a Gatsby tool or a React tool; it was written by someone and put on NPM, and I was able to bring that in and use it on my project.
So those are a few of the gotchas we’ve encountered along the way. I hope that they help some of you out!
Conclusion
We’ve seen why using WordPress as a headless CMS is a good solution, how it meets a particular problem: performance. But it’s more robust as well, you’re using two separate sites and can interchange them independently of each other.
This makes your site more scalable. Say you have a site you know is going to get a lot of hits as soon as the site launches. You can serve visitors a static site which is populated on CDNs all over the world. This will immediately scale up or down based on the user’s need, instead of hitting one server all the time, which could cause a server to overload.
We’ve also seen a few of the tools we’ve used to help use WordPress as a headless CMS, most importantly Hugo & Gatsby for generating static sites. These might not meet your requirements, but there is likely one out there that will.
We’ve also looked at Netlify to help us add dynamic functionality to our static sites.
We’ve also seen some of the other valuable services: Algolia for search and Cloudinary for image hosting.
5. The Future is (probably) headless
So what’s the future going to be? It’s probably going to be headless. Who knows? But the fact is that our data is going to get richer & richer as time goes on, and user needs will continue to diversify as they’re in different situations on different devices.
We can build for this future now by using WordPress as a headless CMS.
I hope you have fun working this way, as we have.